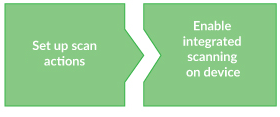
To set up Integrated Scanning, you need to:
set up at least one scan action
enable Integrated Scanning on a device
Predefined scan actions or scanning workflows make the scanning process simpler and faster for your users. A scan action defines the following default settings for a scan job:
destination—whether the scanned document is directed to an email recipient or a network folder.
document details—file name and email subject (if delivery action is email).
input configuration—page orientation and duplex mode.
default output configuration—file type, DPI and color mode.
access—which users and user groups have access to the scan action.
You can create any number of scan actions to meet your needs.
You can set up an email scan action to send a scanned document to either:
the user’s primary email/inbox
a predefined email address
Select → .
A list of all Scan Actions is displayed.
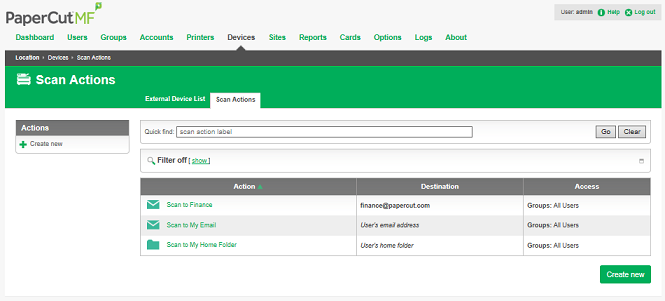
In the menu, click .
The Scan Action Details page is displayed.

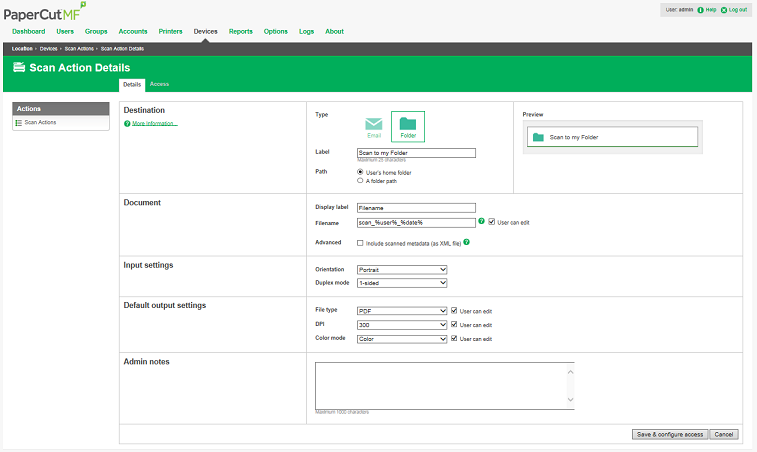
In the Destination area, complete the following fields:
Type—select .
Label—enter a name for the scan action (maximum 25 characters). This label is displayed on the device to the user.
Tip
Make your labels as short and intuitive as possible so that users know what the action is on the device. For example, Scan to my email or Email to Finance.
To—select one of the following:
User’s email address—the scan job is delivered to the user’s email address.
An email address—select this option, then specify the email address to which you want the scan job delivered, for example, [email protected].
Note
Email destinations are assigned to scan actions by the system administrator for security reasons. A user cannot specify an email address. This prevents unsecured scan jobs from being sent. For example, users cannot accidentally mistype an email address and send information to the wrong person.
Subject—enter the default email subject. You can use substitution macros, such as
%Label%in the email subject. For more information about the available macros, click More Information in the Destination area or see the section called “Substitution variables/macros”.User can edit—select this check box if you want to allow users to change the default email subject at the device.
In the Document area, complete the following fields:
Display label—the label for the filename field on the device. If you change the default value of Filename, the label in the next field is also changed. You can change the label to provide more specific guidance to the user about the format of the filename. For example, if you have a scan action to email invoices to the Finance department, and you want the scanned invoice file to be named according to the invoice number, you could change the label to
Invoice No..Filename—the default value for the filename. You can use substitution macros, such as
%Label%in the filename. For more information about the available macros, click More Information in the Document area or see the section called “Substitution variables/macros”.User can edit—select this check box if you want to allow users to change the default filename at the device.
Advanced: Include scanned metadata (as XML file)—select this check box if you want to generate an XML metadata file. For example, you might want to upload the scanned documents to a Content Management System.
The XML metadata file includes the:
shared and personal account name
local date and time of the scan
device used for the scan
email address to which the file was sent
filename
scan job id
username
For more information about the XML metadata file, see the section called “XML metadata file”.
In the Input settings area, complete the following fields:
Orientation—select Portrait or Landscape.
Duplex mode—select 1-sided or 2-sided.
In the Default output settings area, complete the following fields:
File type—select the type of file to create from the scan (PDF, JPEG or TIFF).
DPI—select the resolution of the scan (100, 200, 300, 400 or 600 DPI).
Color mode—select whether you want to use Color, Grayscale or B&W (black and white).
User can edit—select this check box if you want to allow users to change any of the default output settings at the device.
Note
Some devices do not support all available settings. In these cases the default settings might be different to those you select.
If you want to include any notes about the scan action, enter them in the Admin Notes area. For example, if you have specified an email address, you might want to explain who the email is being sent to.
Click .
The Access List page is displayed.
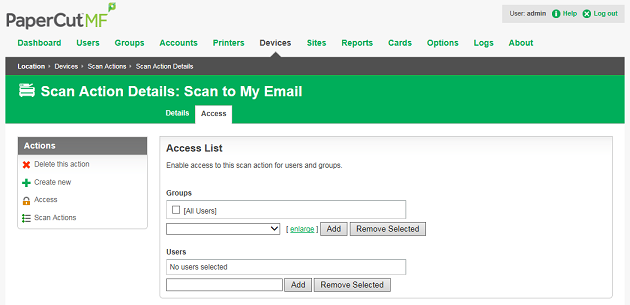
Select the groups and users to whom you want to make this scan action available:
Select the group or user from the drop-down list.
Click .
For more information about setting up groups, see the section called “Groups in PaperCut MF”.
You can set up a folder scan action to send a scanned document to either:
the user’s home folder/personal directory
a predefined network path
Important
The network folders must be accessible from the PaperCut MF server. For more information, see the section called “Groups in PaperCut MF”.
Select → .
A list of all Scan Actions is displayed.
In the menu, click .
The Scan Action Details page is displayed.
In the Destination area, complete the following fields:
Type—select .
Label—enter a name for the scan action (maximum 25 characters). This label is displayed on the device to the user.
Tip
Make your labels as short and intuitive as possible so that users know what the action is on the device. For example, Scan to my Home Folder or Scan to Finance.
Path—select one of the following:
User’s home folder—the scan job is delivered to the user’s home folder.
Note
Maximum length is 256 characters.
A folder path—select this option, then specify the path to which you want the scan job delivered, for example,
N://finance/docs/.Note
Maximum length is 1000 characters.
In the Document area, complete the following fields:
Display label—the label for the filename field on the device. If you change the default value of Filename, the label in the next field is also changed. You can change the label to provide more specific guidance to the user about the format of the filename. For example, if you have a scan action to send invoices to a specific folder, and you want the scanned invoice file to be named according to the invoice number, you could change the label to
Invoice No..Filename—the default value for the filename. You can use macros, such as
%Label%in the filename. For more information about the available macros, click More Information in the Document area or see the section called “Substitution variables/macros”.User can edit—select this check box if you want to allow users to change the default filename at the device.
Advanced: Include scanned metadata (as XML file)—select this check box if you want to generate an XML metadata file. For example, you might want to upload the scanned documents to a Content Management System.
The XML metadata file includes the:
shared and personal account name
local date and time of the scan
device used for the scan
email address to which the file was sent
filename
scan job id
username
For more information about the XML metadata file, see the section called “XML metadata file”.
In the Input settings area, complete the following fields:
Orientation—select Portrait or Landscape.
Duplex mode—select 1-sided or 2-sided.
In the Default output settings area, complete the following fields:
File type—select the type of file to create from the scan (PDF, JPEG or TIFF).
DPI—select the resolution of the scan (100, 200, 300, 400 or 600 DPI).
Color mode—select whether you want to use Color, Grayscale or B&W (black and white).
User can edit— select this check box if you want to allow users to change any of the default output settings at the device.
If you want to include any notes about the scan action, enter them in the Admin Notes area. For example, if you have specified an email address, you might want to explain who the email is being sent to.
Click .
The Access List page is displayed. This page allows you to set the scanning permissions.
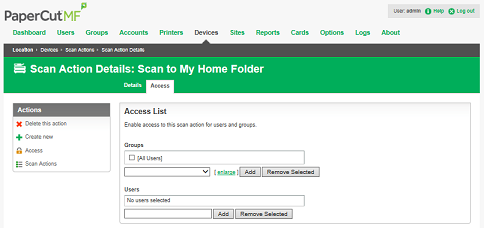
Select the groups and users to whom you want to make this scan action available:
Select the group or user from the drop-down list.
Click .
The user or group is added to the Access Control List (ACL).
For more information about setting up groups, see the section called “Groups in PaperCut MF”.
For each scanning device, you must enable Integrated Scanning.
Important
You need to ensure your Multifunction Device has been configured for Integrated Scanning. For more information, see the embedded manual for the device.
Select .
The External Device List page is displayed.
Click the device for which you want to enable Integrated Scanning.
The Device Details page is displayed.
In the Integrated Scanning area, select the Enable Integrated Scanning check box.
Note
This option is not available if your device does not support Integrated Scanning.
Click OK.