Table of Contents
The PaperCut MF software application for Multifunction Devices provides secure Integrated Scanning. PaperCut MF Integrated Scanning offers a simple, one-touch scanning experience, providing the most common scan job settings, and a consistent interface across Multifunction Device (MFD) brands. You can easily control, track and report on all scan actions on your devices using this scan control application.
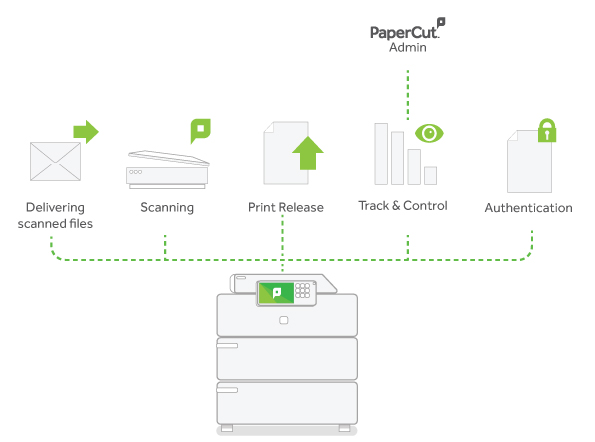
You can use this scan management software to create scan actions that control the scan settings and delivery methods available to your users. These scan actions can be set up once and used across all supported devices, providing a consistent experience for your users. You can control access to each scan action at the user or group level. Users can select a scan action to quickly and easily perform scan jobs and charge the job to an account.
PaperCut MF can also generate XML metadata for scan jobs (including filename, date and time) for Electronic Document Management (EDM) purposes. You can use this metadata to integrate scanned documents into your existing business systems. For example, you can set up your document management system to watch a network folder to which scanned PDF documents are delivered. When a new scanned file is added to the folder, the document management system can upload the file and the associated XML metadata.
Integrated Scanning is currently supported on the following devices:
Sharp MFD (minimum 10 inch display)
Kyocera MFD (minimum 7 inch display)
For more information about which models are supported and the device requirements, refer to the embedded manual for the device or contact PaperCut MF support.
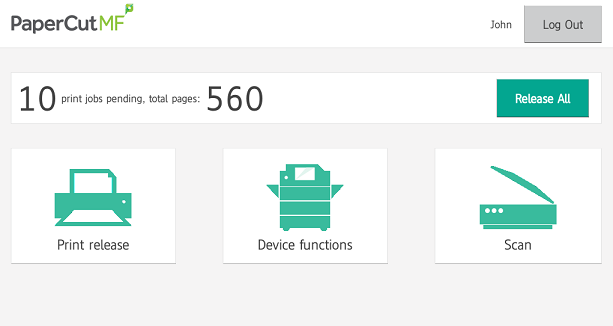
When a user logs in to a Multifunction Device that supports Integrated Scanning, the PaperCut MF home screen is displayed. This screen allows users to choose from the following:
Release all—quick release of all print jobs. This option is available only if print release is configured and there are print jobs awaiting release.
Print release—secure print release and Find-Me printing
Device functions—access the native copier interface
Scan—secure Integrated Scanning
Important
The PaperCut MF home screen is not displayed if Integrated Scanning is not configured.
When a user selects on the Multifunction Device home screen, the following Scan Actions menu is displayed.
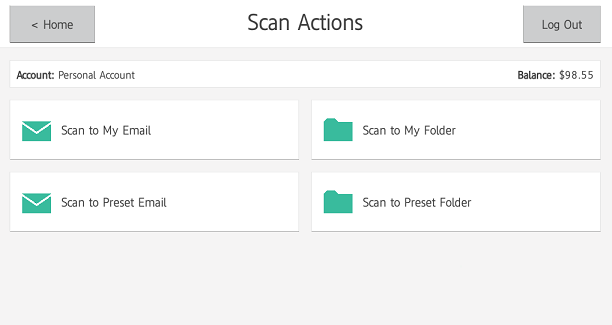
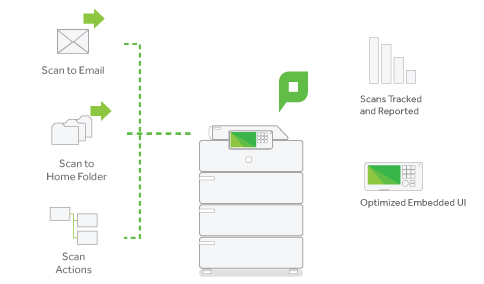
Users can securely scan and send documents (without additional authentication) to:
their own email address
their own network home folder
a specified email address
a network folder destination
However, the options available on this menu are dependent on the scan actions you configure.
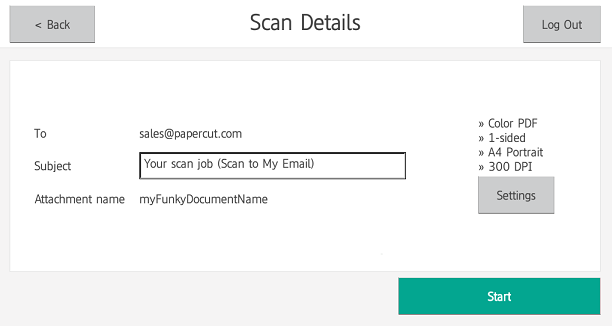
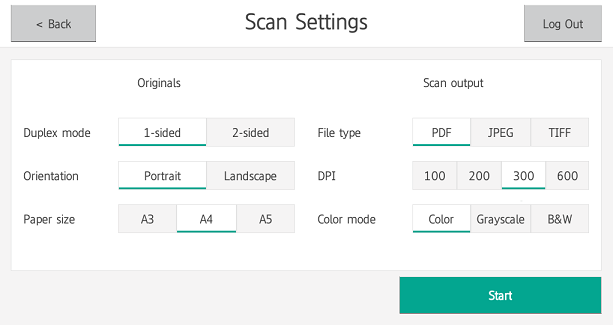
The default settings for the selected scan action are displayed. An administrator can select whether or not users can change these default settings. Scanning is very simple with these predefined settings; users simply need to click Start.
You can set up multiple scan actions to suit the needs of different user groups.
West Face University would like to implement Integrated Scanning for both the teachers and the students. The teachers have their own networked home folders, but students do not. Teachers should be able to scan to either their home folder or to their school email address. Students should only be able to scan to their school email address.
In this situation, you would set up the following scan actions:
Scan to home folder—only available to teachers
Scan to user’s email—available to all students and teachers
You could set up a group for teachers and a group for students to easily assign access permissions. The user details for all users must include their school email address, and all teachers need a configured home directory.

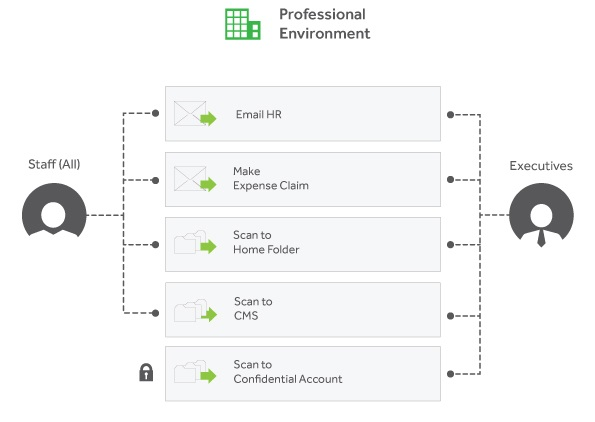
SandComp is a large manufacturing company implementing Integrated Scanning. They want to streamline the delivery of scanned files to the HR and Finance departments. They also use SharePoint as a Content Management System, which they use to store data.
In this situation, you would set up the following scan actions:
Email to HR—available to all employees and is delivered to a generic HR email address.
Email expense claim—available to all employees and is delivered to the member of the Finance team who is responsible for expense reimbursements.
Scan to home folder—available to all employees for their own purposes.
Scan to CMS—available to all employees and delivers the scan job to a networked folder from which it can be uploaded to a Content Management System.
Confidential scan—available only to executives
The user details for all users must include an email address and a home directory.
Since the Scan to CMS scan action delivers scan documents that will be uploaded to a Content Management System (SharePoint), this scan action needs to generate XML metadata.